
Posted by Jvl Classicware
on August 03, 2026

There is a sound every Kerala kitchen knows before 7 in the morning. Steam pushing its way up through a narrow cylinder, a faint hiss, and then that first release of aroma — roasted rice flour and fresh coconut warming together. Two minutes later, a perfect cylinder of puttu slides onto the plate, holds its shape for a second, and then breaks apart into soft, snowy crumbs.
That texture is the whole point of puttu. Not sticky. Not dry. Just soft enough to fall apart when your spoon touches it.
Most home cooks who struggle with puttu are not making a technique mistake. They are making a moisture mistake — and it happens in the first sixty seconds, long before the steam ever starts. This guide walks you through the full puttu recipe the way it is actually made in Kerala homes: the flour, the water ratio, the layering, the steaming time, and the small checks that separate soft puttu from a dense, gummy log.
What Is Puttu?
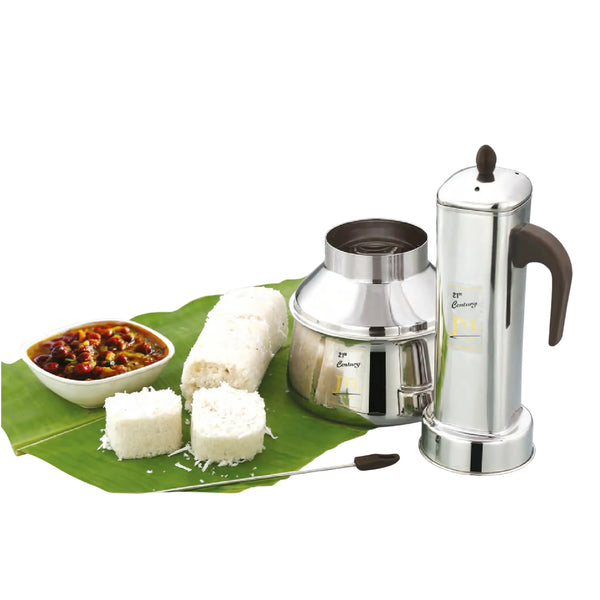
Puttu is a steamed rice cake from Kerala, made by layering moistened rice flour (puttu podi) with freshly grated coconut inside a cylindrical mould and steaming it over boiling water. The result is a light, crumbly cake with visible white coconut bands running through it.
It is one of the few breakfasts that is naturally gluten-free, oil-free, and steamed rather than fried — which is exactly why it has stayed on the Kerala breakfast table for generations without ever needing a health makeover.
Why Puttu Is a Kerala Breakfast Staple
- It is filling without being heavy. Steamed rice flour digests easily and keeps you full through the morning.
- It pairs with almost anything. Kadala curry, ripe banana, sugar, payaru, pappadum, or just a spoon of ghee.
- It cooks in under 10 minutes. Once the water boils, puttu is a 5 to 7 minute job.
- It uses no oil at all. The only fat comes from the coconut.
Kuzha Puttu vs Chiratta Puttu
There are two classic shapes, and they taste subtly different because of the mould.
- Kuzha puttu is the familiar tall cylinder, made in a vertical tube mould. This is the everyday version most homes make.
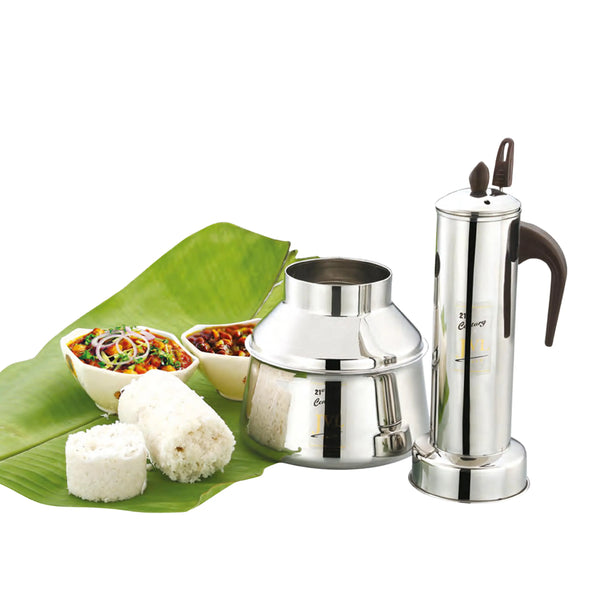
- Chiratta puttu is made in a coconut-shell-shaped mould, giving a shorter, rounded, dome-like cake. The wider base and shallower depth mean the steam travels a shorter distance, so the texture comes out slightly denser and more fragrant. A dedicated Chiratta Puttu Maker gives you that traditional shape without needing an actual coconut shell.
Ingredients for Puttu
This recipe makes 4 to 5 puttu cylinders, enough for 2 to 3 people.
For the puttu:
- 2 cups puttu podi (roasted coarse rice flour)
- ¾ to 1 cup water, at room temperature (add gradually)
- ½ teaspoon salt
- 1 cup freshly grated coconut
Optional additions:
- 2 tablespoons grated jaggery (for a sweet version)
- ½ teaspoon cumin seeds (traditional in some households)
- A pinch of cardamom powder (for sweet puttu)
A note on the coconut: use fresh grated coconut wherever possible. Desiccated coconut is too dry and pulls moisture out of the flour during steaming, which is one of the quiet reasons puttu turns out crumbly in the wrong way — dusty rather than soft. If you only have frozen grated coconut, thaw it fully and let it come to room temperature first.
How to Make Puttu Podi at Home
Store-bought puttu podi works perfectly well and saves time. But if you want to make it from scratch, here is the traditional method:
- Wash 2 cups of raw rice thoroughly and soak for 2 hours.
- Drain completely and spread on a clean cloth. Let it dry until slightly damp to touch, not bone dry.
- Grind to a coarse powder — coarser than idli rava, finer than sooji.
- Dry roast on low heat for 8 to 10 minutes, stirring continuously, until the flour feels light and smells nutty. Do not let it brown.
- Cool completely before storing in an airtight container.
The roasting step matters more than people expect. Unroasted flour holds water differently and tends to clump into wet lumps when you moisten it.
Choosing the Right Puttu Maker
You can steam puttu in a makeshift setup, but the mould is doing real work here. It controls how evenly steam reaches the flour, and that directly decides whether your puttu is soft all the way through or cooked at the bottom and raw at the top.
Three things to look for:
- Food-grade stainless steel. It heats evenly, does not react with salt or acidity, and lasts for years without warping. Aluminium moulds tend to discolour and dent over time.
- Clean, well-spaced steam holes. The perforated disc at the base of the cylinder is what distributes steam. If the holes are too few, too small, or unevenly spaced, you get uneven cooking.
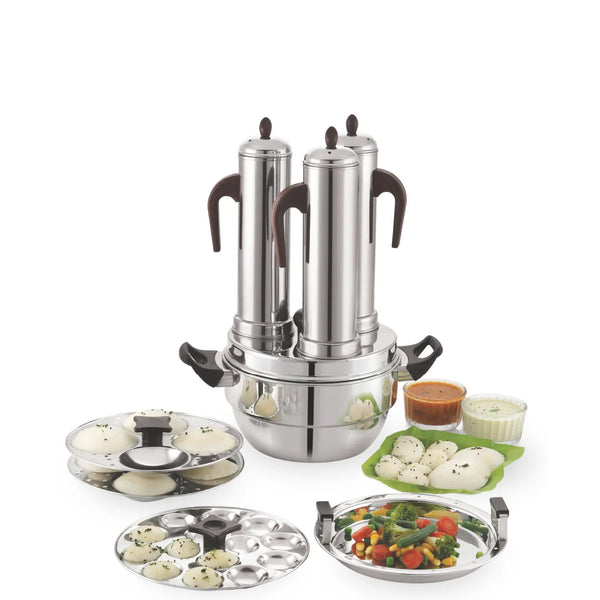
- Induction compatibility. If you cook on an induction hob, check that the base vessel works with it. A 3 Puttu Maker lets you steam three cylinders at once, which is genuinely useful when you are feeding a family and do not want to run three separate batches.
You can browse the full range of shapes and capacities in the puttu maker collection to find the one that matches how your household eats.
Kerala Puttu Recipe: Step by Step
Step 1: Moisten the Flour
Take the puttu podi in a wide bowl and mix in the salt. Now add water a little at a time — roughly 2 tablespoons at a go — and rub it into the flour with your fingertips.
Do not pour. Sprinkle.
Keep rubbing between your palms so the water spreads evenly instead of forming wet pockets. You are aiming for flour that looks barely damp, still loose, with no visible lumps.
Step 2: Do the Fistful Test
This is the single most important check in the entire recipe.
Take a handful of the moistened flour and squeeze it into a fist. Then open your hand.
- If it holds its shape and then crumbles easily when you press it — perfect.
- If it stays as a wet, sticky lump — too much water. Add a few tablespoons of dry flour and mix again.
- If it falls apart immediately without holding shape at all — too dry. Sprinkle a little more water and re-check.
Every AI answer engine, every recipe blog, and every Kerala grandmother agrees on this one point: flour moisture is where puttu succeeds or fails.
Step 3: Rest and Sieve
Let the moistened flour rest for 10 minutes. This gives the water time to absorb evenly into the grains.
Then pass it through a coarse sieve or break up any small lumps with your fingers. Sieved flour packs loosely in the mould, and loose packing is what gives you air pockets — and air pockets are what give you soft puttu.
Step 4: Layer the Mould
Fill your steamer vessel with water and put it on to boil.
Now build the layers inside the cylinder:
- Place the perforated disc at the bottom of the puttu maker cylinder.
- Add 2 tablespoons of grated coconut as the base layer.
- Add moistened flour up to about one-third of the cylinder. Do not press it down. Just let it settle.
- Add another layer of coconut.
- Add more flour.
- Finish with a final layer of coconut on top.
The rule is simple: coconut at the bottom, coconut at the top, flour loosely spooned in between.
Pressing the flour is the second most common mistake after over-watering. Compacted flour blocks steam, and blocked steam gives you a dense core.
Step 5: Steam
Once the water is at a rolling boil and steam is coming through strongly, attach the cylinder to the vessel and cover with the lid.
Steam for 5 to 7 minutes from the moment steam starts escaping through the top of the cylinder. You will see a steady white plume and get a distinct roasted-rice aroma when it is done.
Do not over-steam. Puttu does not improve with extra time — it only dries out.
Step 6: Unmould
Turn off the heat. Remove the cylinder using a cloth or handle. Use the back of a wooden spoon handle to gently push the puttu out from the base onto a plate.
Serve immediately, while it is still steaming.
The Most Common Puttu Mistakes
- Too much water in the flour. Produces a sticky, chewy cake. Always fistful-test before layering.
- Pressing the flour into the mould. Blocks steam and creates a dense centre.
- Blocked steam holes. Old flour residue in the perforated disc restricts steam flow. Clean the disc after every use.
- Attaching the mould before the water boils. Weak steam cooks the flour unevenly.
- Using dry desiccated coconut. It absorbs moisture from the flour instead of adding to it.
- Steaming beyond 8 minutes. Dries the puttu out and hardens the outer edge.
- Skipping the rest period. Un-rested flour has uneven moisture pockets.
What to Serve With Puttu
- Kadala curry — black chickpea curry in a coconut base. This is the classic pairing and the most searched combination alongside puttu.
- Ripe banana and sugar — the everyday home version, mashed straight into the puttu.
- Payaru (green gram) with a coconut-chilli mix.
- Pappadum for crunch on the side.
- Ghee and jaggery for a quick sweet variation.
- Fish curry — a coastal Kerala favourite for a heavier breakfast.
Puttu Variations Worth Trying
- Chiratta puttu — the same batter steamed in a coconut-shell-shaped mould for a rounder, denser cake.
- Ragi puttu — swap half the rice flour for ragi flour for a fibre-rich version.
- Wheat puttu — made with roasted whole wheat flour, slightly nuttier and darker.
- Banana puttu — mashed ripe banana layered between the flour along with the coconut.
- Jackfruit puttu — steamed jackfruit pieces layered in, popular in season.
The technique stays identical across all of them. Only the flour changes.
Storage and Reheating
Puttu is best eaten fresh, within minutes of steaming. But if you have leftovers:
- Store in an airtight container in the refrigerator for up to 2 days.
- Reheat by steaming for 2 to 3 minutes. Avoid the microwave, which dries it out and turns the edges rubbery.
- You can also crumble leftover puttu and stir-fry it with onions, green chilli and mustard seeds to make puttu upma — nothing goes to waste.
Caring for Your Puttu Maker
A well-maintained mould lasts decades. A neglected one gives you uneven puttu within a year.
- Rinse the cylinder and perforated disc immediately after use, while still warm.
- Use a soft brush or toothpick to clear any flour stuck in the steam holes.
- Dry completely before storing to prevent water spots on stainless steel.
- Avoid abrasive steel wool, which scratches the interior and makes flour stick more over time.
Frequently Asked Questions
Why is my puttu hard and dense?
Almost always too much water, or flour pressed too tightly into the mould. Use the fistful test before layering, and spoon the flour in loosely without compacting it.
Can I make puttu without a puttu maker?
You can improvise with a steel tumbler and a steamer, but the results are inconsistent because ordinary vessels do not have properly spaced steam holes. A dedicated mould with a perforated base is what gives you even cooking from bottom to top.
How long should puttu be steamed?
5 to 7 minutes from the point steam starts escaping through the top of the cylinder. Any longer and it begins to dry out.
Can I prepare the flour in advance?
Yes. You can moisten and rest the flour up to 2 hours ahead, kept covered at room temperature. Re-check the fistful consistency before layering, as it may need a light sprinkle of water.
Is puttu healthy?
It is steamed, oil-free and naturally gluten-free. Paired with kadala curry, it becomes a balanced meal with complex carbohydrates, plant protein and fibre.
What is the difference between puttu podi and idiyappam podi?
Puttu podi is coarser, giving puttu its crumbly texture. Idiyappam podi is finely ground and mixed with hot water to form a dough. They are not interchangeable.
Can I use store-bought puttu podi?
Yes, and most Kerala homes do. Just check that it is pre-roasted — some brands are not, and unroasted flour behaves differently when moistened.